Friday, May 30, 2008

Homemade Bathtub Paint

I've always thought about buying bathtub paint for my kids but have yet to do it. I happened to find a recipe for homemade bathtub paint and I'm going to give it a try soon. It's easy to make and the ingredients are very inexpensive. It's the weekend now and I find that I tend to let my kids linger and play longer in the tub on the weekends since daddy is home to help and we are less rushed. The weekend seems like a great time to give this bathtub paint a try. Art in the tub! Fun and easy to clean. Sounds like a winner to me!

The Recipe for this tub paint was found at FamilyFun.Com

Color-me-clean Tub Paints
½ cup liquid hand soap, clear or white
1 teaspoon cornstarch
Food coloring

Time needed: Under 1 Hour
1. Combine the soap and cornstarch in a small bowl. 2. Divide the mixture into separate containers, then add food coloring one drop at a time. Caution: Test the paints on a small area of your tub or wall first to make sure they won't leave a stain; darker hues may be more difficult to wash off. Tips: Apply to tub and body with fingers or paintbrushes. Use bathroom cleanser to clean the tub if any color remains. Keep any leftover paints in airtight containers in the refrigerator for up to three days.

If you try it with your kids too, I would love to know how they (and you) liked it.

Stumble Upon Toolbar Add to Technorati Favorites

Thursday, May 29, 2008

Teaching Children Compassion

I recently received a comment pertaining to my post titled "Making Old Toys New Again". Here is the comment/question "...[H]ow did you introduce this concept? I don't think mine would understand if I told them other kids don't have toys to play with. We have worked on sharing and she's OK with that - although I don't know if she just does it to avoid conflict or if she really wants the other one to have a toy to play with".

Great question! I decided to just respond in a new post as there may be others wondering the same thing. After giving it some thought, I decided to address sharing, compassion and random acts of kindness as they tie together well. Hopefully, I can give you some helpful hints along the way.

I will start by admitting that I don't have a magic answer and my kids have not completely mastered this skill. The majority of the time, they do a great job but they are normal 4 year olds who can be selfish sometimes. My twins have always been very close to each other. They had to learn to share at an early age. We had plenty of screaming, grabbing, biting and hitting to work through with two small children in each others space. Children are naturally egocentric and selfish. Children may very well be sharing to avoid conflict or because that is what they have been told to do. It takes time for children to genuinely want to share.

I've found that the best way to teach compassion to children is to model it. You will probably discover that you are already teaching a lot of compassion to your child without even realizing it. I started with my children early on by showing them a lot of compassion and empathy. I involve them in acts of compassion and random acts of kindness. We try to do nice things within our family as well as outside of our family. When we see others doing nice things for people, I try to point it out to my children "Look, that person opened a door for us". "That little girl shared her snack with the boy who had none".... I encourage them to share with others because it's the right thing to do. We talk a lot about feelings and how we feel when others do kind things for us. We also talk about how we might feel if we needed something and no one would share. I try to get them thinking to help them come to realizations on their own. With younger children, you will need to give them the words and help them learn the feelings. I try to involve my children in simple acts of charity. I'll list a few examples of the things we have done and continue to do to help instill compassion and sharing.

A store we frequent requires a quarter in order to get a shopping cart. When you finish with your cart, you get the quarter back. Sometimes we leave our quarter in the cart for the next person. I tell my kids that we are going to leave a quarter so that someone who doesn't have a quarter will be able to get a cart. It's just a simple way to make someone smile. Another store we frequent has electronic pony rides for a penny. We often bring extra pennies and leave them for the next child. These are just very simple ways to show caring. At first my kids wanted to use the extra penny for a second pony ride which is completely normal but eventually, they caught the excitement of being generous. It's a building process.

Every Thanksgiving season the Salvation Army sends out cards asking for donations to feed the homeless a Thanksgiving meal. We enjoy participating in the effort each year and this year we decided to get the kids on board. We told them that we already had all of the food we needed for Thanksgiving and we still had some money left to share with others. We told them that we could buy some Thanksgiving dinners for people who didn't have money to buy food. We then asked them how many dinners the would like to buy and let them pick the amount.

As I already mentioned in my earlier post (Making Old Toys New Again), we do toy donations. We explain that some children don't have toys and it would make them happy if we shared ours. I make it clear that we will not give all of our toys away. My husband and I also set the example by donating our own stuff too. Younger children may not question why children would have no toys. Older preschoolers may be curious. My children became very curious and filled with questions around 3 years old.

When we are playing with other children, we talk about sharing our toys because it makes others happy. We are happy when other children share their toys. We might feel sad if we played with a child who would not share anything because it wouldn't be a very fun time.

We also read a lot of Bible stories and use Jesus as our example. Jesus wants us to be kind and loving and he wants us to share with others and not be selfish. We ask Jesus to help us.

I also let my children know that it's okay if they don't want to share everything. Some things are very special to us and it's okay if we don't want to give them away or share them but we must be kind about it.

We make cards for family members who are sick. Bring meals to friends or family members who could use a helping hand. We talk about why we are doing these things. Just simple lifestyle lessons. Your children are watching you all of the time. Talk about what you are doing and why you are doing it when they are young as it lays a good foundation for them.

WEEKLY CHALLENGE: Model compassion for your children this week and talk to them about it. Involve them in a simple act of sharing or a random act of kindness or compassion. You can choose one of the ideas I've already mentioned or come up with one of your own. I would love to hear what others do/have done to teach sharing and compassion to your children. You can leave me a comment or email me at kim@lessonplansplus.com

A Fun Tip: Sometimes when I catch my kids doing something kind for someone, I pull them aside and compliment them and sometimes I even give them a stamp on their hand. I have a bunch of rubber stamps and washable stamp pads and my kids love getting stamped. They don't always get a stamp when they do "random acts of kindness". Stamping is very random and an easy way to help reinforce the concept. I never want them to expect rewards for doing nice things. I want them to internalize but as we all now, sometimes young children need a little external motivation before they are able to internalize. This is a fun and easy motivator.

In addition to doing this at home with my own children, I also used this method successfully when I was teaching preschool outside the home. One year I had a classroom of children who did not show a lot of compassion for each other when the school year began. Many didn't want to share and did not use very kind words or actions. I began talking to them, modeling for them and really pumping up the idea of being kind. It didn't take long for lots of kids to get on board and when others saw and heard the praise and occasional stamp, they wanted in on it too. I found myself giving out lots of stamps in the beginning but eventually, the stamps faded but the kindness continued which was my goal.

Stumble Upon Toolbar Add to Technorati Favorites

Wednesday, May 28, 2008

Doughnuts for Dad: Fathers Day Idea

With Fathers Day approaching, I want to share something that I did every year when I was teaching preschool outside the home. To celebrate dads and their kids, my classroom hosted "Doughnuts for Dad". Dads were always a little jealous when I hosted Muffins for Mom. I let the dads know that they had a fun event coming up too and they were pleased to find out that instead of muffins, they would get doughnuts. The children helped make doughnut shaped invitations to hand out to the dads. A few days before the event, I stopped by a local bakery to order and pay for all of the doughnuts and designate a pick-up time the morning of Doughnuts for Dad. The dad's were very happy to have fresh doughnuts. I kept things very simple because dad's usually prefer simple. I offered a nice variety of doughnuts and juice for the dads and children to enjoy together. The children made homemade cards to give their dads and some years I ordered small gifts for them to present to dad. One year I ordered baseball bat ink pens for each dad from Oriental Trading Company and those were a "hit".

This would be an easy event to duplicate at home or with a group of home school children. A home school group could get together at one home, a park or a nearby doughnut shop. Your family could take dad out for doughnuts or simply enjoy doughnuts together at home in honor of dad. I know at my house we rarely eat doughnuts so this would be a very special treat for everyone. I realize for some, dad is not part of everyday life but there is often another male role model that could be celebrated such as a grandfather, uncle or special friend. This is a great time of year to honor the important men in the lives of our children.

Stumble Upon Toolbar Add to Technorati Favorites

New Resource for Mom's of Preschoolers

My friend Hope recently started a new blog for moms with preschoolers. I would encourage moms to check it out as it's a fun site with lots of great ideas . This week you can enter her giveaways and possibly win a cool prize like a subscription to Family Fun magazine. http://simplyamom.wordpress.com/

I think this is a great mom resource so I added the link to our resource section on the left of the page for easy access.

Stumble Upon Toolbar Add to Technorati Favorites

Thursday, May 22, 2008

Memorial Day Activities and Patriotic Projects

I would like to start off by saying thank you to all of the military families past and present. I have so much respect for all of the men and woman who serve our country.

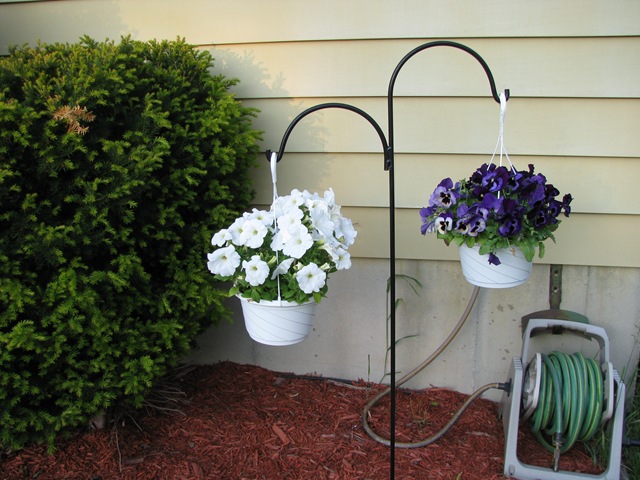
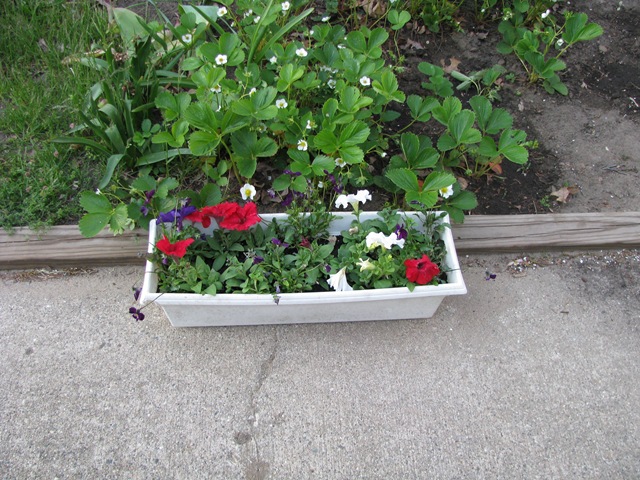
In honor of Memorial Day my children and I have been doing a few patriotic projects. We planted some "patriotic" flowers in the yard and have been doing our annual red, white and blue decorating. We've also enjoyed a few art projects and a simple, healthy and yummy patriotic snack. I would love to share some of our ideas with you. These simple projects would be perfect to do at home or in a classroom or daycare setting.

Patriotic Straw Painting:
I added some water and liquid soap (my trick to help paint wash off easier) to a small bowl of red paint, a bowl of white paint and a bowl of blue paint. I wanted the paint to be a runny consistency. I gave my children paint brushes, construction paper and straws. I demonstrated how to splatter paint onto construction paper and then I instructed them to aim their straws at the splattered paint on the paper and blow the paint around the paper (being careful not to suck in any paint).

Hand Print Flags:
I used red, white and blue paint to paint the palms of my children's hands like a flag. I alternated red and white paint on their fingers, painted a small blue square in the corner of their hand (across form the thumb) and I painted their thumbs blue (white would look nice too). When finished, they pressed their hands onto a small piece of construction paper and then placed a star inside of the blue square on their hand print. The end result was a sweet little hand print flag.


Patriotic Painting with Brushes:
I gave my kids blue construction paper along with red and white tempera paint and just let them paint however they chose. I did the same with red construction paper, blue and white paint. The end result was red, white and blue creative artwork.

Fancy Patriotic Parfait:
My children helped make a healthy fruit parfait by slicing bananas and strawberries with a plastic knife. I used their prepared fruit to make parfaits. I used some champagne glasses to make the parfaits a little more fun and fancy. We layered vanilla yogurt, blueberries, bananas and strawberries. I ended with a dollop of yogurt on top sprinkled with a few more blueberries. This was an was an easy, healthy and fun snack that my kids loved.

Some other ways to celebrate Memorial Day and be patriotic:

Go watch a parade with your family. Many cities and towns host Memorial Day parades.
Wear red, white and blue clothing.
Invite some friends, neighbors or family members over for a back yard barbecue.
Enjoy spending time with your family.
Fly an American Flag
Make cards for Veterans and drop them off at a nearby Home for Veterans if you have one in your area.
Make sure to say thank you to anyone you know who serves or has served in our military.
Visit a Veterans Memorial if you have one nearby.
Do a random act of kindness for a Veteran or Veteran family. Some ideas could be weeding, raking leaves, mowing a lawn or even dropping off a homemade treat or card to show gratitude.
Pray for the men and women who serve our country and all of the families associated with them.

Stumble Upon Toolbar Add to Technorati Favorites

Wednesday, May 21, 2008

Flower Power.

As promised earlier, here are a few pics from our recent plantings.  Not all of them are from my garden which I decided looks a little too messy to share with the world.  The photos I snapped tonight don't quite do it justice.

IMG_0127 IMG_0124

IMG_0121

Stumble Upon Toolbar Add to Technorati Favorites

Updates to Lesson Plans Plus Website

Just a quick note to say that I updated the LessonPlansPlus.com website to make it easier to navigate.  You may need to hit refresh in your browser if you've visited in the past so the changes take effect.  I also added a survey/feedback page so that readers can tell me what they would like to see in the future.  I'd love to hear from you!

Stumble Upon Toolbar Add to Technorati Favorites

Tuesday, May 20, 2008

Kids in the Garden

I hope everyone had a wonderful weekend. I haven't posted in a several days because my kids and I have been very busy outside the past few days. We started on Friday doing yard clean-up and getting our garden area prepped. Saturday morning we went to a greenhouse way out in the country and loaded up with some of our favorite flower, fruit and vegetable plants. We don't have a very big yard but gardening has always been a big deal to me. Spending time in the garden getting my hands dirty is a wonderful stress relief. I think gardening is very therapeutic. Of course, my favorite part is reaping the fruits (and vegetables) of my labor. I love being able to grab something fresh from the garden. Even my small garden is an inspiration to eat fresh and healthy. I've tried to expose my kids to the joys of gardening ever since they were old enough to walk. I also enjoyed exposing my students to small bits of gardening when I was teaching outside the home. There's just something special about planting a seed or small plant, tending to it and watching it grow. It's a great lesson in patience and learning to care for something. I think including children in planting and gardening activities at an early age helps foster an appreciation and love for nature. I'm trying to build positive memories with my children that will carry over into their adult lives. I hope that they will always appreciate and respect nature and have a desire for fresh and healthy foods.

Weekly Challenge: Even if you don't have a large space to work with, I would encourage everyone to enjoy getting your hands a little dirty by planting something somewhere. Even if it's just a small herb garden in a patio box or some flower, herb or vegetable seeds in a Terra Cotta pot.

I'll try to post some pictures later with some of the things we planted around our house.

Some tips to make gardening/planting successful with small children:

~If you visit a greenhouse, do it close to planting day. I try to get things planted the same day or the next.

~Get all of your suppplies organized and ready ahead of time as the kids will be anxious to get started.

~Expect to get dirty (you and the kids).

~Child size gardening gloves are great for the little ones who don't love getting dirty hands. I found child size gardening gloves in the dollar bins at Target.

~If planting with a large group, it works best to work with 2 or 3 children at a time rather than have an entire class trying to do a potting activity at once. I've found that writing each child's name on a pot in permanent marker works great and eliminates confusion over ownership if you plan to send the plants home.

~Expect that young children may lose interest and/or become impatient with a gardening activity. If you are going to be involved in the project for an extended time period, plan a few low maintenance activities for the children to do alongside or near you as they tire of gardening.

Stumble Upon Toolbar Add to Technorati Favorites

Thursday, May 15, 2008

Signing Time!

Have you ever thought about doing sign language with your children? I started introducing sign language to my children when they were about 15 months old. My good friend Lorrie offered me her set of Signing Time videos and I was instantly hooked. I was not very skilled in sign language so I learned right along with my kids using the Signing Time videos. Sign language really helped my children communicate more effectively with me and took away a lot of frustration during those years when they were still learning to verbalize.
Scientific studies have shown that “typical” children who learn to sign have higher IQ scores, are better adjusted and read at an earlier age. My four year old twins still love to watch Signing Time. I actually really enjoy it too. Signing Time makes sign language fun, entertaining and very easy to learn. I highly recommend giving Signing Time a try whether you are a mom with a baby, toddler or preschooler. Signing Time would also be great to use in a preschool or Kindergarten classroom. I took a sign language class for adults several years ago but I discovered that I actually learned more from Signing Time than I did in my class and watching Signing Time was way more fun! If you would like to find out more about Signing Time check out their site: The Official Signing Time Store! .
*Disclosure: Due to our positive experience with the Signing Time videos we have decided to partner with them as an advertiser. Clicking on the links or ads here will also benefit Lesson Plans Plus. Thanks!

Stumble Upon Toolbar Add to Technorati Favorites

Tuesday, May 13, 2008

Sensory Challenge

I just realized that I forgot to post a weekly challenge: My challenge to you is to enjoy a sensory activity with your children this week. Whether you fill up a bin with water or rice, roll out some cookie dough and bake, press your fingers in paint or feel the smooth and rough textures of rocks on a nature walk....have fun and let the stress of the day melt away as you think about your own childhood memories. Enjoy something simply delightful through the eyes of a child.

I would love to hear what you did! Feel free to leave a comment or email me to let me know about your simply delightful moment.

Stumble Upon Toolbar Add to Technorati Favorites

Dutch Spice Cookies

I've been thinking about taking my children to a place called Windmill Island. Windmill Island is home to a 240 year old working Dutch windmill and over 150,000 tulips are are in bloom this time of year. While I was looking over the Windmill Island website I started remembering the times I went there as a child. When I think of Windmill's, I also think of the Windmill cookies we used to buy from the store when I was a kid. I don't have a Windmill shaped cookie cutter but I do have a yummy recipe for Dutch Spice Cookies that brought back some good memories of baking as a child. Maybe I'll be able to find myself a Windmill shaped cookie cutter at Windmill Island. Whether I find one or not, I plan to enjoy this recipe with my kids and sharing is nice so....enjoy!

Dutch Spice Cookies (recipe from the "Cookies for Kids" cookbook that my mom had when I was a little girl)

Ingredients
1 cup butter or margarine
1 1/2 cups packed brown sugar
1 egg
3 1/2 cups all-purpose flour
2 tsp ground cinnamon
1 tsp ground nutmeg
1/2 tsp ground cloves

Directions
Beat butter with an electric mixer until softened. Add brown sugar and beat until fluffy. Add egg, beat well. In a separate bowl stir together flour, cinnamon, nutmeg and cloves.With mixer on low speed, gradually add flour mixture to butter mixture, beating until well mixed. Cover and chill in the refrigerator for about 1 hour or until firm enough to handle.

Preheat oven to 350. Roll dough into 1 inch balls. Place about 2 inches apart on ungreased cookie sheets. Flatten with a floured cookie stamp or the bottom of a drinking glass with a design in it.

Bake for 8 to 10 minutes or until light brown on bottom.

Stumble Upon Toolbar Add to Technorati Favorites

Monday, May 12, 2008

Butterfly Fun


Today my kids and I went to a playgroup at our local library. The theme was bugs and butterflies. There was a sensory bin filled with water and pretend bugs and among the bugs was one butterfly. Both of my children were especially attracted to that one butterfly so I thought it would be fun if I could find some bugs and butterflies for our own sensory table at home. After playgroup, we needed to stop by the store so I decided to take a quick look in the toy section for some pretend butterflies. I found a tube filled with an assortment of 16 bugs and butterflies for $3.99 at Target. Perfect! I also bought a couple bags of rice for our sensory table. Back at home, I poured the rice and bugs inside our sensory bin and the kids had a wonderful time playing. They even arranged some of their painted rocks (we get a lot of mileage out of those rocks!) inside the bin and made a colorful rock garden for their pretend bugs.

We also had butterfly craft time at home this evening. One of the crafts was from playgroup but my kids chose not to do it there. I actually had all of the supplies at home because I was planning a similar project later in the week. We made two variations of coffee filter butterflies. I let the kids color coffee filters with markers. When they finished coloring, I bunched the coffee filter together down the middle and secured it with a pipe cleaner. The pipe cleaner became the body of the butterfly as well as the antennae. The second butterfly craft was similar only I used a clothes pin as the body of the butterfly. After fastening the clothes pin in place, the kids glued on tiny wiggly eyes, drew a face and colored the body.

After completing our butterfly craft, My kids enjoyed helping me read aloud one of our favorite Eric Carle books "The Very Hungry Caterpillar".

Do your kids enjoy butterflies too? When I was teaching preschool outside the home, every year I ordered a live butterfly garden from a company called Insect Lore. It was a wonderful learning experience for the children to have such a hands-on approach and to watch butterflies unfold before their eyes. Our local botanical gardens has a wonderful butterfly exhibit every year and my own children and I spent many days there this Spring watching the butterflies bloom.

Stumble Upon Toolbar Add to Technorati Favorites

Thursday, May 8, 2008

Rock On (Part 2)

I had a feeling that this activity was going to be a hit with my kids but I did not anticipate that it would delight them for over two hours.

We are really enjoying rocks at our house these days. I gave each of my kids a small bucket and we set out for another rock hunt. I told them to collect as many rocks as they wished as long as they fit inside the bucket. Being the particular children that they are, they took their time hunting and choosing rocks that appealed to them. We spent nearly 30 minutes outside wandering around looking for the most special rocks. We had a good conversation about colors, textures, shapes, sizes and even talked how some rocks may have been formed. It was a lot of fun.

Once inside, I filled a large plastic bin with soapy water and placed it on a large towel on the kitchen table. I suddenly thought to take the opportunity to toss in a bit more of a science lesson and I grabbed some food coloring from the pantry. I asked the kids what would happen if we put blue and red food coloring into the water. They already knew the answer but it was still fun to swirl their little hands around in the water mixing the colors together.

After they played in the bubbles for a bit, I told them that they could drop their rocks into the water and scrub them clean. I handed out sponges and they engrossed themselves into rock scrubbing and playing for nearly an hour. I had no idea they would have that much fun with rocks, soapy water and a sponge. I finally talked them into laying the rocks out on a towel to dry so I could clear the table for lunch. They agreed because they knew that after lunch, the next activity would be painting the rocks.

I sent them into another room to play a memory match game while I cleaned off the table and prepared lunch. As promised, after lunch, I lined the table with newspaper, set out various colors of washable tempera paint (some with added glitter) and paintbrushes and I let them paint until their hearts content. They had each collected at least 20 rocks and painted most of them with care which took over 30 minutes. They were kind enough to let me to paint a couple of rocks.

The painted rocks are now very special treasures. I suggested placing them back out into the yard but that idea did not go over at all. Instead, they have been storing them in their buckets and using them in a variety of creative ways. It's so much fun to watch the imaginations of my children soar with such simple things. I can't promise that your kids will spend over two hours on this project like mine did but I think I would be safe to promise some fun. One project became a science activity, nature activity, sensory experience, art activity, language and learning opportunity and a wonderful outlet for creative expression. Not bad for a pile of rocks.

Stumble Upon Toolbar Add to Technorati Favorites

Icky, Sticky Messes and Clothing

As I was working on my laundry pile again today I started thinking about some practical solutions that I've learned over the years that have helped me save several items of clothing from permanent damage. I thought it might be helpful to share these tips for others who may not have tried them yet.

  • Removing ink from clothing: Spray with hairspray, let it soak in and then wash.

  • Dirty leather shoes: Baby wipes work really well.

  • Removing blood stains: Immediately apply hydrogen peroxide (Do not use hydrogen peroxide on wool, silk or dry clean only fabrics), rub it into the stain and then launder.

  • Removing Gum from clothing: Place the item in the freezer for 2 to 3 hours and the frozen gum will usually peel right off.

  • Washing clothes for sensitive skin: Add 1/3 cup of vinegar to the rinse cycle of your washer. The vinegar will help get rid of soap residue on the clothes. White distilled vinegar also helps prevent yellowing of clothing, acts as a fabric softener and reduces static cling.

I have also found that keeping a spray bottle of SHOUT stain remover next to my washing machine is helpful to quickly treat stains. When I was teaching in the classroom, I kept a Shout stain stick and a bottle of hairspray in my supply cabinet. I also kept a bin of extra children's clothes on hand so that if a child ended up with a large stain or mess but didn't bring a change of clothing, I was still able to treat the stain and give the child a fresh article of clothing to wear. Although stains, messes and kids go together, I had many thankful parents when I was able to treat a stain or clean a mess on a special piece of clothing.

What cleaning tips and tricks have worked for you? Maybe you have a solution that I haven't tried. I would love to hear your ideas. Email me at kim@lessonplansplus.com.

Stumble Upon Toolbar Add to Technorati Favorites

Tuesday, May 6, 2008

Mother's Day Ideas

I've always enjoyed making hand print art with my students. These days, I do a lot of hand print art with my own children at home. I love saving their precious little hand prints to look back on later. Hand print art is very common but there is a good reason for it, mom's love getting hand print gifts. Hand print and fingerprint art makes for a fun art project, sensory experience and science project too.

For Mother's Day I like to do hand print flowers. Paint the child's hand with one color or use as many colors of washable tempera paint as you wish. Instruct child to keep fingers together. Press the child's hand onto a sheet of card stock paper. The child can then dip her finger into green paint and make a fingerprint stem for the hand print flower.

I like to make copies of a fingerprint poem to glue onto the hand print flower picture. One of my favorite poems to compliment Mother's Day hand print artwork is below. The author is unknown.

Sometimes you get discouraged
Because I am so small,
And always leave my fingerprints
On furniture and walls.
But everyday I am growing,
I'll be grown up someday,
And all these tiny hand prints
Will simply fade away.
So here's a final hand print
Just so you can recall,
Exactly how my fingers looked
When I was very small.

Love, (Child's name and date)

Stumble Upon Toolbar Add to Technorati Favorites

Muffins for Mom

When I was teaching preschool outside the home, I had an annual tradition each Spring to have my students host "Muffins for Mom". We planned the event a few days before Mother's day. The children helped make invitations to give to their mom and/or grandma a few days before. We made the invitations in the shape of a muffin. I bought a bunch of easy muffin mixes to keep things simple and the children worked hard the day before baking muffins and making decorations for the tables.

I set aside a 1 1/2 hour block of time in the morning where mom's could come and go as needed. We offered a variety of muffins, fruit and juice for the moms, grandma's and children to enjoy. The children surprised their mom's with handmade Mother's Day gifts and/or cards during the muffin breakfast. I also purchased items that would serve as table decorations and be additional gifts for the moms. Some examples of the items I have purchased: Fresh flowers, individually wrapped chocolates set out in pretty bowls and unlit candles. Muffins for Mom was always a simple event but the mom's and children always looked forward to it and really enjoyed the special day.

If your toddler or preschooler is not in a classroom setting, you can still have fun altering this idea at home. You can bake muffins with your children and enjoy them together or even organize a muffin making play date with some little friends and moms and enjoy eating the muffins together.

Stumble Upon Toolbar Add to Technorati Favorites

Sick Day

I need a sick day but it's not going to happen. I can't tell my two preschoolers that mommy is off duty for the day. My kids were sick last week and they were nice enough to share their germs with me. I knew that I needed to find some low effort projects to keep my high energy kids busy today.

  • I put a few pipe cleaners out on the kitchen table along with a pile of Cheerios for each child. They strung the Cheerios onto the pipe cleaners to their hearts content and we made several bracelets and rings. When they finished their projects, I let them eat the Cheerios off their creations and then start over again.
  • When they tired of that activity, I used Elmers glue to trace each child's name onto a piece of construction paper and then I let them stick Cheerios onto their name.

It was a simple low effort, low energy project for me that kept my kids busy, happy and quiet for awhile. I didn't even have to worry about making them a snack because they ate plenty of Cheerios while doing their projects. They also got to learn about ABC's and work on their fine motor skills.

Weekly Challenge: Have some fun with food. I'll post a few other ideas soon.

Stumble Upon Toolbar Add to Technorati Favorites

Saturday, May 3, 2008

LessonPlansPlus.com has a new look!

Just a quick update to say that the lessonplansplus.com website has a cool new look. You can check it out here: http://www.lessonplansplus.com/. Also I wanted to point everyone to my husbands new website: http://www.nofearmri.com/. It's an informational site for anyone having an MRI. If you know someone who is, please pass the word about this site.

Stumble Upon Toolbar Add to Technorati Favorites